Tutorial: Basic EditingUsing Adobe Photoshop Elements 6.0
I started with this photo, opened in Adobe Photoshop Elements 6.0.

I first went to Enhance>Adjust Lighting>Shadows/Highlights.

I adjusted the shadows and highlights using the bars.

I then went to Enhance>Adjust Lighting>Brightness/Contrast

I adjusted the brightness and contrast using the bars.

Next, I went to Image>Rotate>90° Left


Then I went to Enhance>Adjust Color>Adjust Hue/Saturation.

I chose a redder, darker hue, then increased the saturation.

Then I went to Enhance>Adjust Lighting>Shadows/Highlights.

I decreased the "Lighten Shadows" and increased the "Darken Highlights".

Then I went to Enhance>Adjust Sharpness.

I increased the amount by 100% and decreased the radius to .5 pixels.

Then I went to Image>Crop...


...and adjusted the size of the box to the size I wanted.

I then went to Filter>Texture>Texturizer.

I chose "Canvas" from the "Texture" drop-down menu.

From the "Light" drop-down menu, I chose "Top Left".

I then checked the box next to "Invert".

Next, I used the Quick-Selection Tool.


I selected the entire arch.

Then, I went to Enhance>Adjust Color>Color Variations.

I darkened the selection.

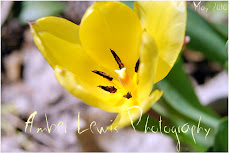
This is my completed photo, through basic editing, using Adobe Photoshop Elements 6.0.

(Before)


 Our puppy, Dexter.:) Check out all the other pets at I Heart Faces.:)